Pages
Portals will become a long term replacement to this feature. This feature allows VisualVault Administrators the capability to add custom pages into VisualVault that help direct users through or into the companies business processes implemented in VisualVault. Administrators can also bring together information needed by management to control business processes.
Pages are accessed via the My Pages control added to the My Vault portal, or from a Custom Top level menu. Access to a page can be controlled by the security applied to the page.
Administrators do not need to know HTML to access or layout pages in the Page Admin screens.
You may want to refer to the following topics for more information:
Portal Admin - Refer to this topic in order to understand how to add the My Pages Control onto the portal
Menu Administration - Refer to this topic in order to understand how to add a Custom Top Level menu item to access the page.
VaultAccess user status is required to create, design, and delete a custom page.
Adding and Deleting a Page
Adding a Page
-
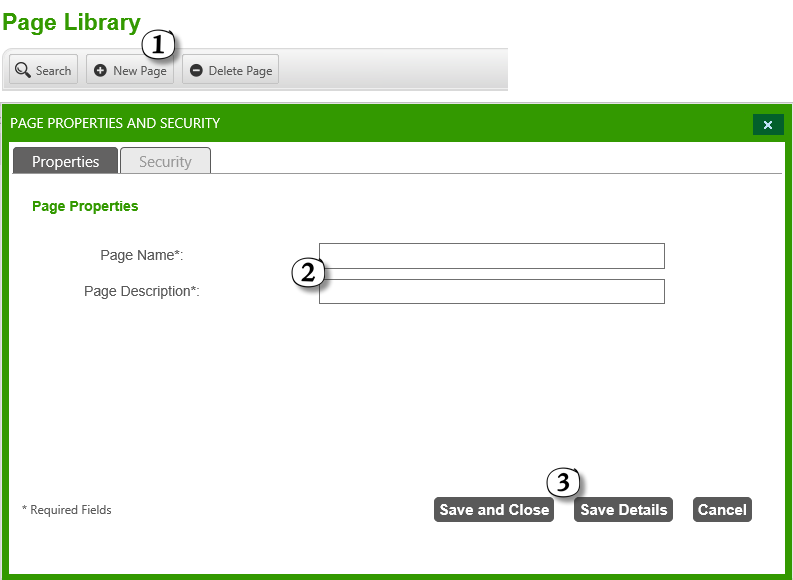
Select the Add Page button at the top of the Page Library screen to open the Page Properties and Security window.
-
Enter the required information. The Page Name must be unique.
-
Select the Save and Close button to create the page and return to the library, or select Save Details to create the page and remain in the Page Properties and Security window.
Deleting a Page
The configuration of the page is not recoverable after deleting the page.
-
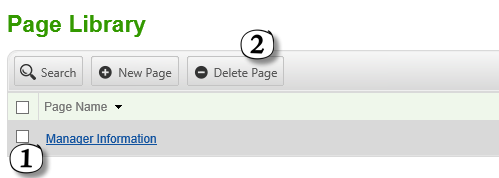
Select the page to be deleted by clicking the check box next to the Page Name.
-
Select the Delete Page button at the top of the Page Library.
Page Information and Security
Page ID Card: Properties
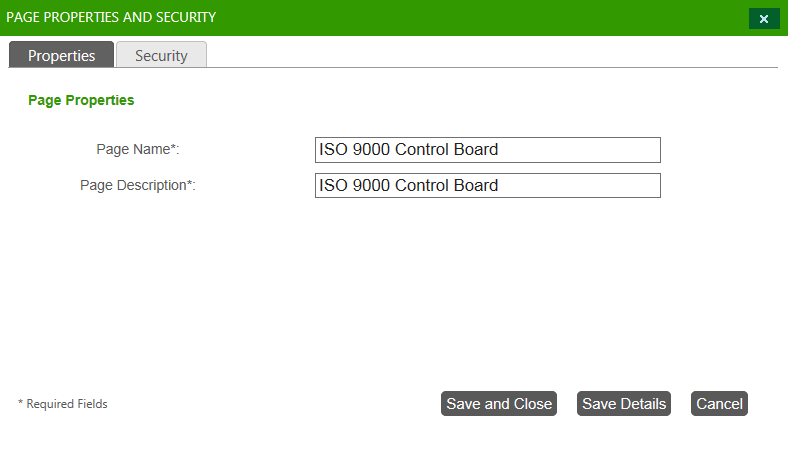
The Page ID Card is accessed by navigating to the Page Library and selecting the Edit link for the page to be configured. The Page ID Card has two different tabs along the top. This section will explain the Properties tab.
The Properties tab contains metadata associated with the custom Page, mainly the Page Name and Page Description. This information can be modified at any time as long as the name is unique.
Page ID Card: Security
The Page ID Card is accessed by navigating to the Page Library and selecting the Edit link for the page to be configured. The Page ID Card has two different tabs along the top. This section will explain the Security tab.
Administrators can configure who has access to a page by configuring the security within the Page ID Card by following these steps:
-
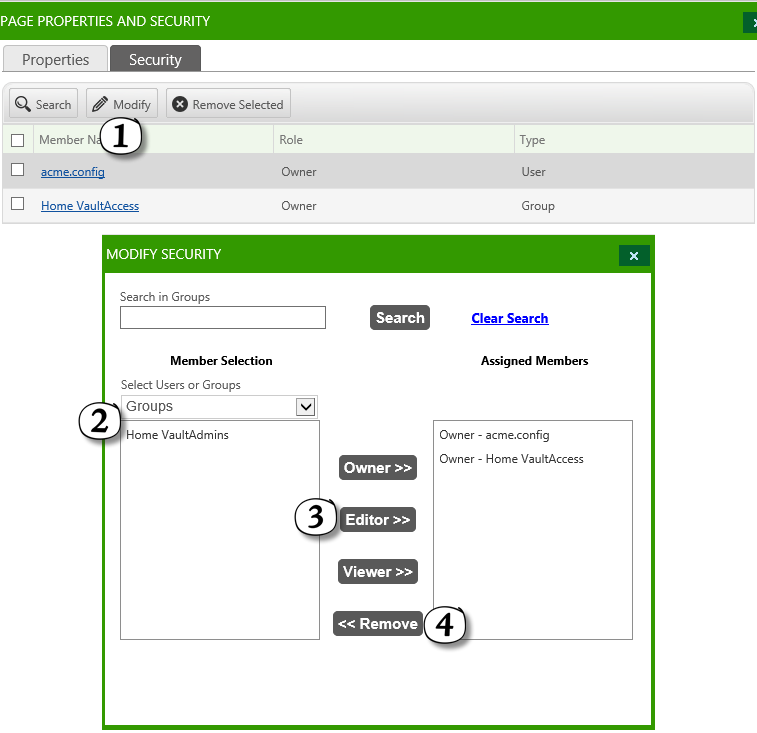
Navigate to the Security tab and click the Modify button.
-
Select Users and/or Groups to be added in the Member Selection column.
-
Assign the selected User/Group by clicking the Owner, Editor, or Viewer button, depending on the level of security desired.
-
Remove a User/Group by clicking the Remove button after selecting them from the Assigned Members column.
Administrators can further restrict what users have access to on a page by configuring the tabs and context menus that a certain type of user can see. This is explained in detail under the Page Layout section.
Page Layout
Page Designer
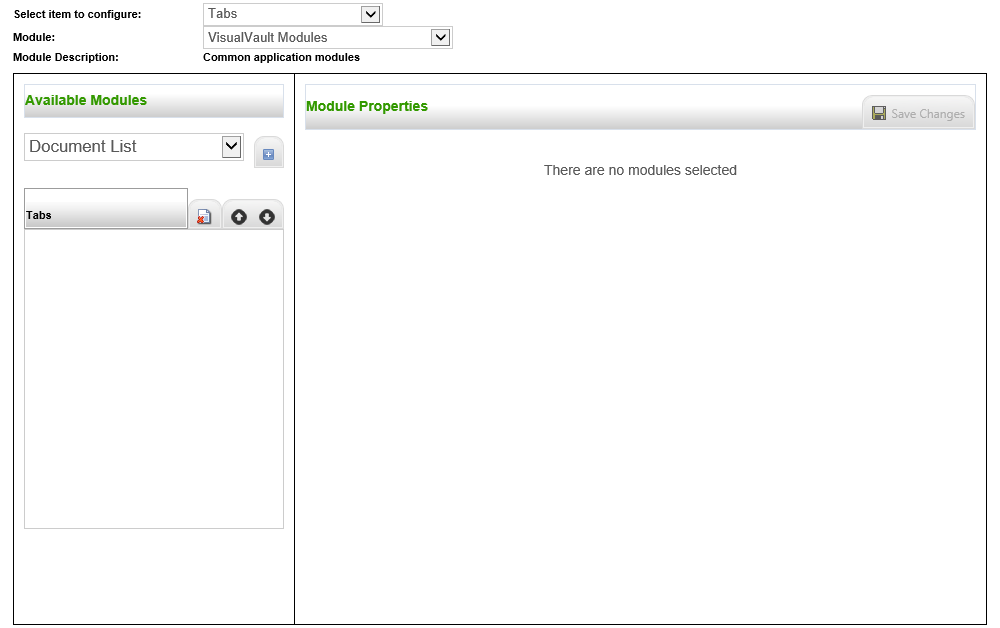
To access the Page Designer, click the Edit Tabs link for the page to be configured. The left hand panel, Available Modules, represents the layout of tabs. The right hand panel, Module Properties, will show the configuration fields for the control selected in the left side of the screen. The
Module drop down list will change to show appropriate modules that contain
module controls. The drop down list inside the Available Modules panel will show the list of module controls associated with the selected module.
Standard Module Controls
There are two standard fields visible when configuring a Module Control:
-
Displayed Text - A short string of text displayed on the tab explaining the purpose or functionality.
-
Minimum Security - The lowest level of security required to view the tab. For example, a Module Control with minimum security set to Editor can be seen by users with Editor and Owner status. A control set to Owner can only be seen by Owners.
Add and Configure a Tab
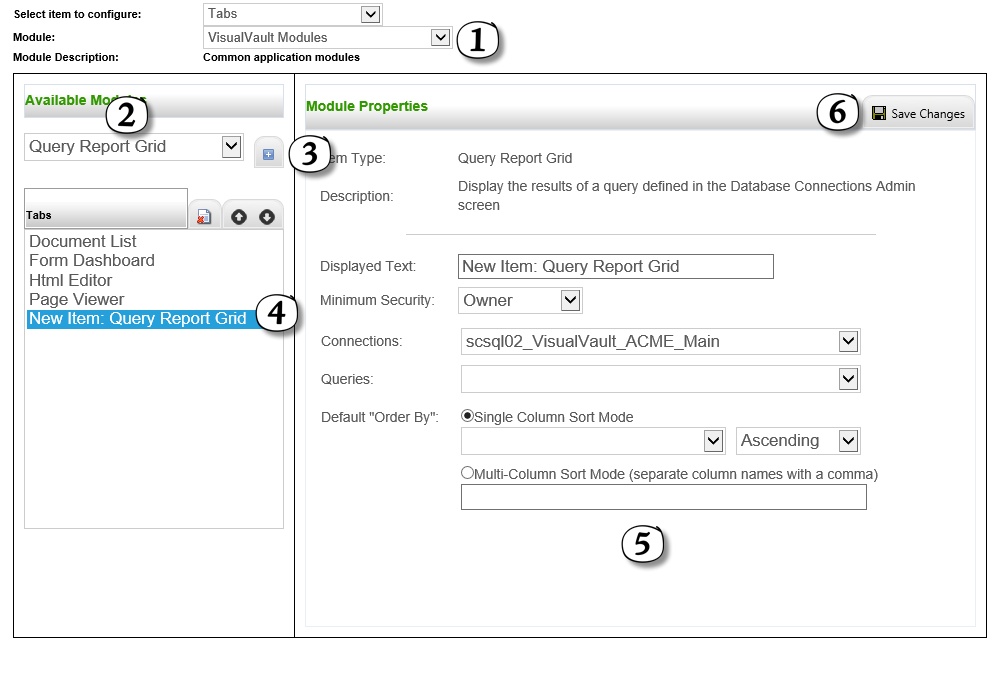
To add a tab to the page, repeat the following steps:
-
Select the Module type from the Module drop down list.
-
Select the Module Control from the Available Controls list.
-
Select the + button to assign the Module Control to the Tabs pane.
-
Select the item just assigned (configuration fields will appear in the Module Properties pane).
-
Configure the item as needed.
-
Select the Save Changes button
Remove or Shift a Tab
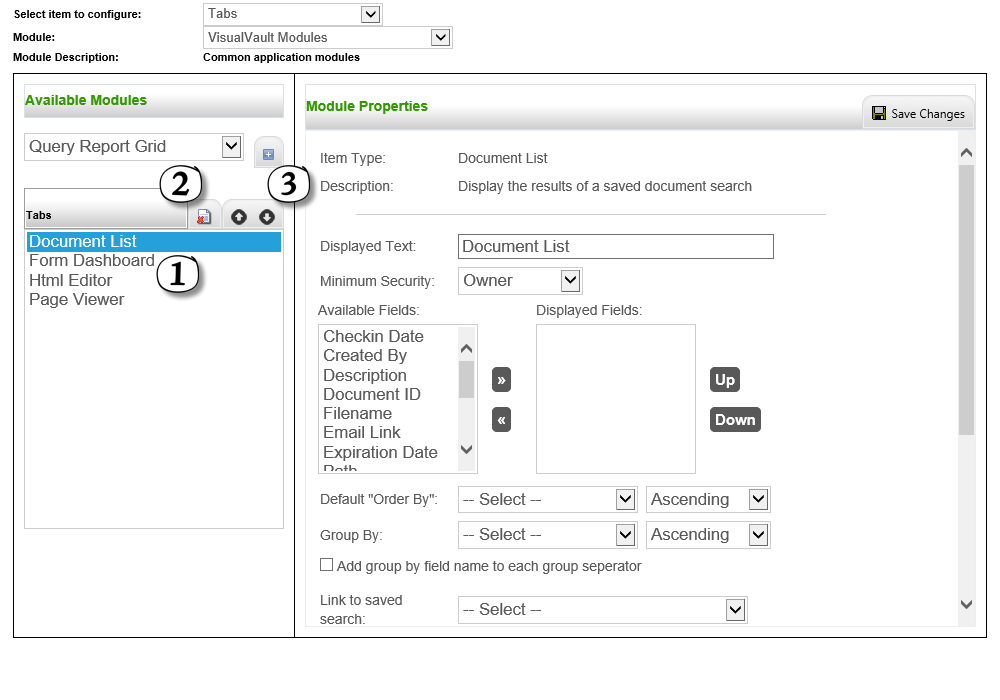
To remove or shift the position of a tab:
-
Select the control in the Tabs field on the Available Modules panel.
-
Select the Remove button to remove the tab.
-
Select the up or down arrow to shift the position of the current tab.
Preview a Page Layout
Once a page has been designed, administrators can preview the page and test its functionality by going to the Page Library or Page Admin screen. Select the link over the name of the page. This will launch the page into a preview mode.